1. Project Overview
This project is located at [insert location]. The construction scope includes wall and ceiling finishing works, covering approximately [insert area] square meters. According to the design requirements, water-resistant putty and eco-friendly latex paint will be used for interior walls. The overall appearance should be flat, smooth, and consistent in color. The project is scheduled to start on [insert start date] and is expected to be completed in [insert duration] days. The quality goal is to achieve a one-time acceptance with no visible defects, meeting national construction quality standards.
2. Construction Preparation
(1) Material Preparation
1. Putty: Select appropriate types based on substrate conditions. Use water-resistant putty for humid areas and regular putty for dry indoor surfaces. Products must have reliable bonding strength, flexibility, water resistance, and filling capability. All materials should have valid product certificates and quality inspection reports.
2. Paint: Use paint varieties that meet design specifications, such as interior latex paint or exterior wall coatings. Paint must have excellent coverage, washability, weather resistance, and environmental compliance. Upon arrival, materials must be verified for brand, model, color, and quantity, and random samples must be tested before use.
3. Auxiliary Materials & Tools: Prepare sandpaper (various grits), rollers, brushes, spray guns, putty knives, mixers, interface agents, primers, and other necessary tools. Ensure tools are in good condition and maintained regularly.
(2) Labor Preparation
Organize a skilled construction team with experience in putty and paint application. Provide all workers with technical briefings and safety training before the project begins, ensuring they understand procedures, quality standards, and safety precautions.
(3) Substrate Preparation
• Surfaces should be firm, flat, clean, and free of dust, oil, release agents, cracks, or hollows. For concrete walls, seams should be ground smooth and cavities filled with cement mortar. Brick walls must have solid joints and comply with flatness tolerance.
• Moisture content requirements: ≤10% for concrete/plaster, ≤12% for wood. If too high, use ventilation or drying equipment.
• Clean the surface with brooms or pressure washers. If necessary, use detergent, followed by clean water and drying.
3. Construction Process
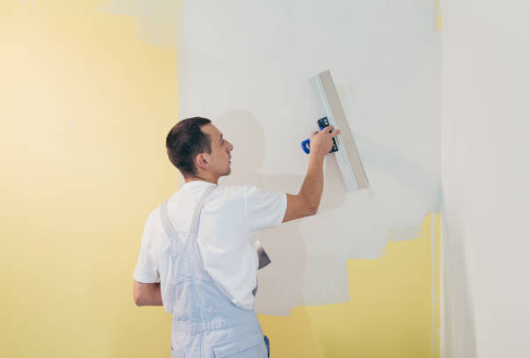
(1) Putty Application
1. Primer (Interface Agent): Apply evenly to enhance bonding. Allow 1–2 hours to dry before putty work.
2. Putty Coating:
• Apply 2–3 layers using a putty knife. Each layer should be 0.5–1 mm thick.
• The first layer is for filling pores and leveling minor defects.
• The second layer (after 12–24 hours) further flattens the surface.
• The third layer fine-tunes the smoothness and appearance.
• Alternate scraping directions per layer and handle overlaps carefully.
3. Sanding: After full drying (1–2 days), sand in a crisscross pattern using 120–320 grit sandpaper, from coarse to fine. Clean off dust afterward using a broom or vacuum cleaner.
(2) Paint Application
1. Primer (Base Coat): After sanding and cleaning, apply primer with roller or spray gun. Ensure no drips, bubbles, or missed spots. Allow 4–8 hours to dry before topcoat.
2. Topcoat:
• Rolling: Use a roller in a "W" or "M" pattern for even coverage. Maintain uniform pressure and overlap by 1/3 to 1/2. Apply 2–3 coats with 4–6 hour intervals.
• Spraying: Maintain 20–30 cm distance, with pressure at 0.3–0.5 MPa. Spray from top to bottom, left to right. Avoid runs or missed spots.
• Brushing: Suitable for corners or small areas. Apply in the same direction with consistent overlap.
4. Quality Control
1. Substrate Inspection: Check for moisture, flatness, and structural integrity before puttying. Do not proceed until issues are resolved.
2. Material Control: Inspect and randomly test all materials. Reject unqualified or expired items.
3. On-Site Monitoring: Supervise each step. Only proceed to the next stage after passing inspection. Pay attention to putty thickness, flatness, drying, paint uniformity, color consistency, and coat thickness.
4. Finished Surface Protection: Protect completed surfaces from damage or contamination using film covers, warning signs, and restricted access.
5. Safety and Civilized Construction• Workers must wear safety helmets. Fall protection such as harnesses must be used and anchored securely.
• Electrical tools should have leakage protection; wires must be routed safely and inspected regularly.
• Putty and paint are flammable—no smoking, keep fire extinguishers on site, and store materials in ventilated, cool places.
• Clear construction waste promptly; maintain a clean and accessible site.
• Install protective enclosures around the site. Workers must wear uniforms and ID badges.
• Avoid noisy operations during rest hours. Treat construction wastewater, dust, and residues according to environmental regulations.
6. Acceptance Criteria
• Putty: Firm adhesion, no peeling, cracking, or hollows. Flatness deviation ≤2 mm (measured with 2 m ruler); corners straight and even.
• Paint: Smooth, even layers without sagging, peeling, or discoloration. Consistent color. Use instruments to check gloss, washability, and coat thickness (deviation ≤±10%). Minimum 3 test points per 100 m².


.gif)
评论
发表评论